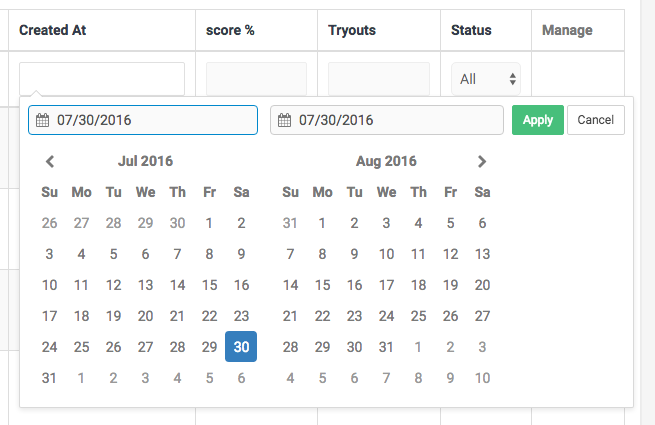
The DateRange Picker Plugin
For this tutorial we are going to use jino5577/yii2-date-range-picker. One thing that I highly recommend to any developer is that, whenever he/she can, tests should be provided to increase the trust of other developers to your open source project. I know that sometimes that is practically impossible due to the small we have (I include myself here) but if we can, we should do it. Nevertheless, this is a widget, and for a widget, there is not much to do and this one have never gave me any issues so far.
Enough talking, let's include the library in our composer:
./composer require jino5577/yii2-date-range-picker "*"In case you are wondering why I am using ./composer command instead of php composer.phar is because I have composer installed globally.
The ModelSearch class
Now, let's imagine that your model User has a created_at attribute and we want to add a date range filtering on that value. In order to do that, we need first to add a public variable on its UserSearch class (the class used for filtering), an attribute that will hold the range values to filter our data with:
1class UserSearch extends User
2{
3	// This attribute will hold the values to filter our database data
4	public $created_at_range;
5
6	// ....
7	public function rules()
8	{
9		return ArrayHelper::merge(
10			[
11				[['created_at_range'], 'safe'] // add a rule to collect the values
12			],
13			parent::rules()
14			);
15	}
16
17	public function search($params)
18	{
19		$query = $this->finder->getUserQuery();
20		$dataProvider = new ActiveDataProvider(
21			[
22				'query' => $query,
23			]);
24		if (!($this->load($params) && $this->validate())) {
25			return $dataProvider;
26		}
27
28		// do we have values? if so, add a filter to our query
29		if(!empty($this->created_at_range) && strpos($this->created_at_range, '-') !== false) {
30			list($start_date, $end_date) = explode(' - ', $this->created_at_range);
31			$query->andFilterWhere(['between', 'user.created_at', strtotime($start_date), strtotime($end_date)]);
32		}
33		// ... more filters here ...
34
35		return $dataProvider
36	}
37}
That's all we have to do to be able to search by a range in our UserSearch class. Now, the next step is to configure the GridView column to add our date range picker.
Configuring GridView column
The last part is even easier than before, we simply configure the column of our GridView as follows:
1use jino5577\daterangepicker\DateRangePicker; // add widget
2/* @var $searchModel common\models\UserSearch */
3// ... lots of code here
4<?= GridView::widget([
5	// ... more code here
6	'columns' => [
7		// ... other columns
8		[
9			// the attribute
10			'attribute' => 'created_at',
11			// format the value
12			'value' => function ($model) {
13				if (extension_loaded('intl')) {
14					return Yii::t('app', '{0, date, MMMM dd, YYYY HH:mm}', [$model->created_at]);
15				} else {
16					return date('Y-m-d G:i:s', $model->created_at);
17				}
18			},
19			// some styling?
20			'headerOptions' => [
21				'class' => 'col-md-2'
22			],
23			// here we render the widget
24			'filter' => DateRangePicker::widget([
25				'model' => $searchModel,
26				'attribute' => 'created_at_range',
27				'pluginOptions' => [
28				'format' => 'd-m-Y',
29				'autoUpdateInput' => false
30			]
31			])
32		],
33	]
34]); ?>
Done, with three simple steps we have now a beautiful date range picker filtering our data by a range.

Accelerate Your Career with 2am.tech
Join our team and collaborate with top tech professionals on cutting-edge projects, shaping the future of software development with your creativity and expertise.
Get StartedDon't miss out on
our latest insights
– Subscribe Now!


