


Email integration can often be complex and time-consuming. Laravel Mail API is a revolutionary microservice developed to address this challenge and speed up the setup process of a mailing service within a microservices architecture.
Laravel Mail API uses a secure AppKey Signature mechanism for request authentication. This mechanism ensures that both the client and the server possess matching keys for verification.
Importantly, the actual keys are never transmitted within the request context, thus enhancing security.
Getting Started
To get started with Laravel Mail API, there are two convenient options:
1. Composer - create a project using Composer by running
$ composer create-project 2am.tech/laravel-mail-api2. Git Clone - alternatively, clone the Git repository using:
$ git clone https://github.com/2amigos/laravel-mail-api.gitRequirements
To run Laravel Mail API effectively, ensure you have the following components in place:
- PHP 8.1.* or above
- Composer
- Redis Server
Docker
For those who would like to use Docker, a Docker container built with Laravel Sail is available for the application.
To use the Docker container, follow these steps:
1) Install dependencies using:
docker run --rm \
-u "$(id -u):$(id -g)" \
-v "$(pwd):/var/www/html" \
-w /var/www/html \
laravelsail/php82-composer:latest \
composer install --ignore-platform-reqs
2) Start the container:
$ ./vendor/bin/sail up -d3) Stop the application:
$ ./vendor/bin/sail stopDependencies
(Note: This step can be skipped if using the Docker container.)
With the service in place, we are now ready to install project dependencies by executing the following command:
$ composer installUsage
Copy the default configuration strings from .env.example file to a .env file.
If using the Docker container, copy the Redis connection strings from .env.sail to your .env file.
Then, run the command to generate the application's key:
php artisan key:generate
// or using docker
./vendore/bin/sail php artisan key:generate
Defining Access Token
The array of access tokens can be found at ./config/laravel-mail-api.php, on accessTokens array index.
1'accessTokens' => [
2   'access-key-user-1' => [
3       'appKey' => 'jwYitJJOop2v',
4       'appSecret' => 'token',
5   ],
6
7   /*
8   | unit tests access token
9    */
10   'tests' => [
11       'appKey' => 'test-token-string',
12       'appSecret' => 'token',
13   ],
14],
Define the AccessKey (the array index), the AppKey, and the AppSecret for each token.
You can define as many access tokens as you need for your microservices structure.
In order to send requests, we need to create a signature using our client token (the same as defined on the server).
The signature uses the HASH-HMAC hash algorithm to create a hashed string, and it takes as parameters the appKey, the current UTC TimeStamp (in ISO8601 format) and the appSecret.
The default hash algorithm is sha512. You can define the desired one by adding HASH_SIGNATURE={hash-alg} in the .env file.
Here is an example of creating a signature:
1HASH-HMACK( {appKey} + {current-timestamp}, appSecret )Or, using our defined token:
HASH-HMACK( 'jwYitJJOop2v' + '2023-08-10T04:32:25.620Z', 'token' )

#cb64bbccdff25dcaba24e4c029aa54d99522a3e2e70e5be7be1b48dd8816b4e05b0102f2a2775c895ac73f649b45f6f97f755a112a9f4a206e4053128fc5ada9
For testing purposes, you can run the command below to easily create a signature:
$ php artisan app:create-signatureor if you're using Docker:
$ ./vendor/bin/sail php artisan app:create-signatureThe signature will be valid for 120 minutes from the moment it was created. You can change the time the signature expires by defining TOKEN_TIME={time in minutes} in the .env file.
SMTP Server Configuration
Before we move ahead to the request submission, we must first define our SMTP server to dispatch our mail.
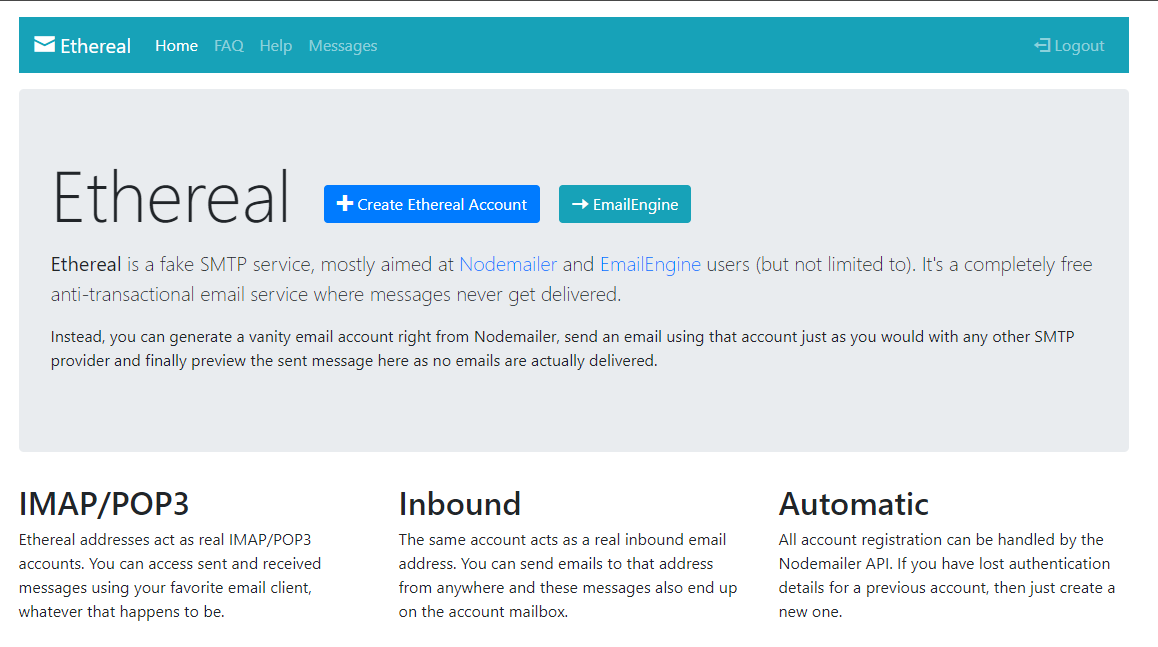
To achieve that, we’ll use Ethereal to create a testing SMTP server and email credentials.
Just click the + Create Ethereal Account button, and you’ll quickly get access to an email address configured under the Ethereal SMTP server.
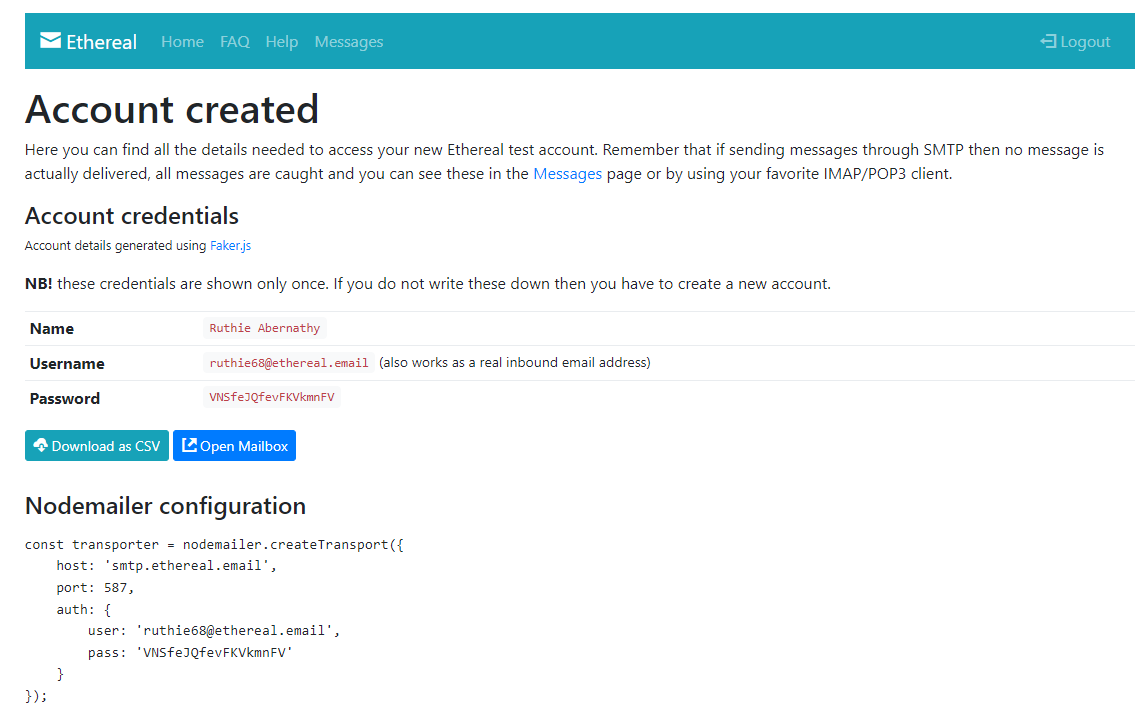
Then, to set up your SMTP configuration in the application, simply change the lines below to match your brand-new Ethereal credentials:
MAIL_MAILER=smtp
MAIL_HOST=smtp.ethereal.email
MAIL_PORT=587
[email protected]
MAIL_PASSWORD=VNSfeJQfevFKVkmnFV
MAIL_ENCRYPTION=tls
MAIL_FROM_NAME="${APP_NAME}"
Serving the Application
You can serve the application with the following command:
$ php artisan serveIt will publish your application on http://127.0.0.1:8000.
(Note: if you’re using the Docker container, your application is already published on port 80.)
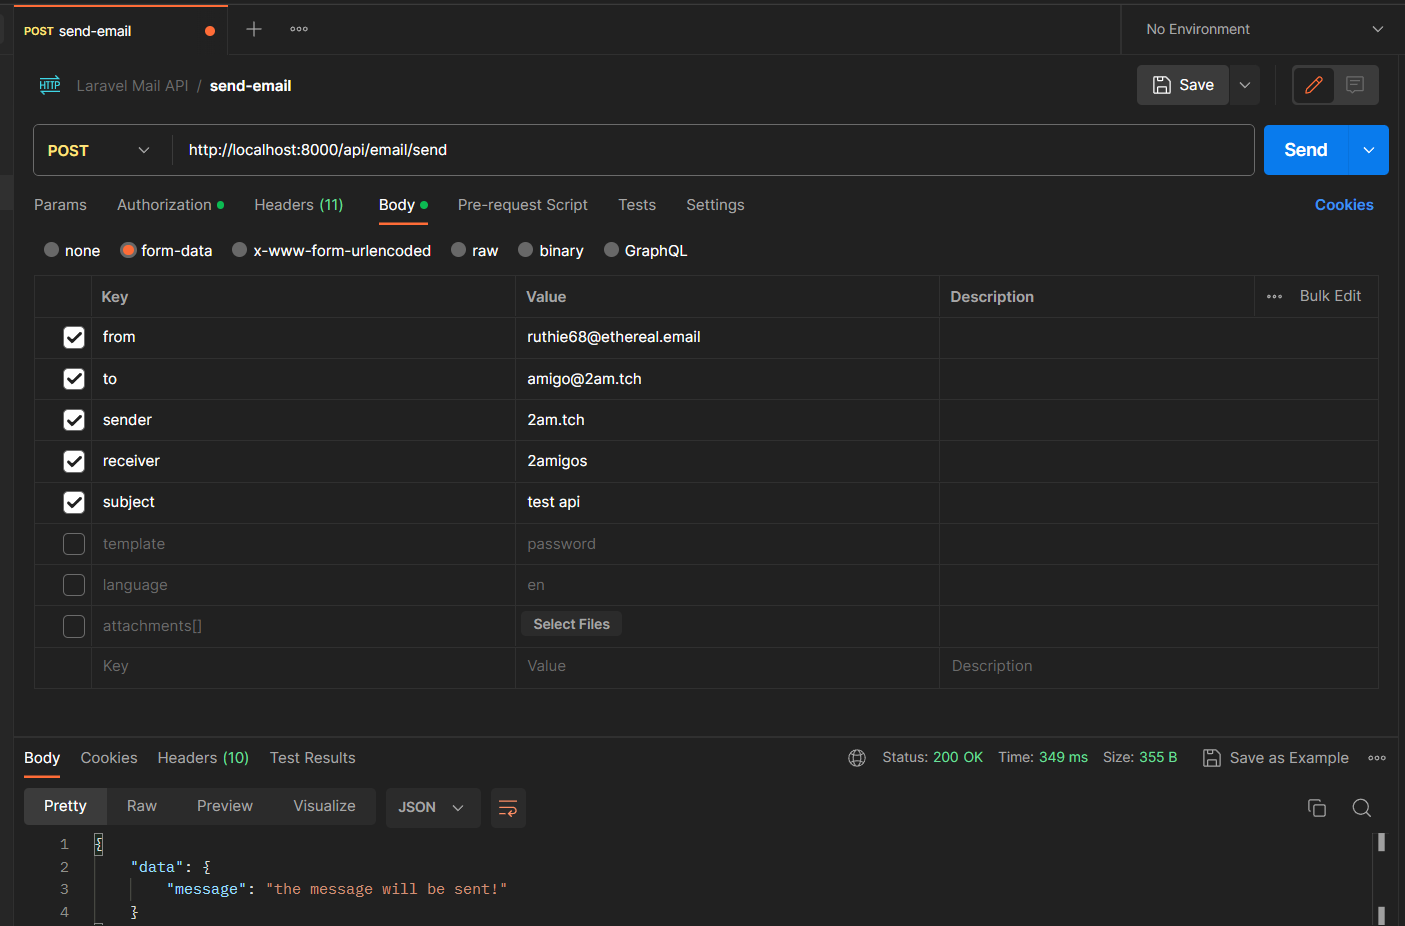
HTTP Endpoint
The Laravel Mail API has a unique endpoint, /api/email/send.
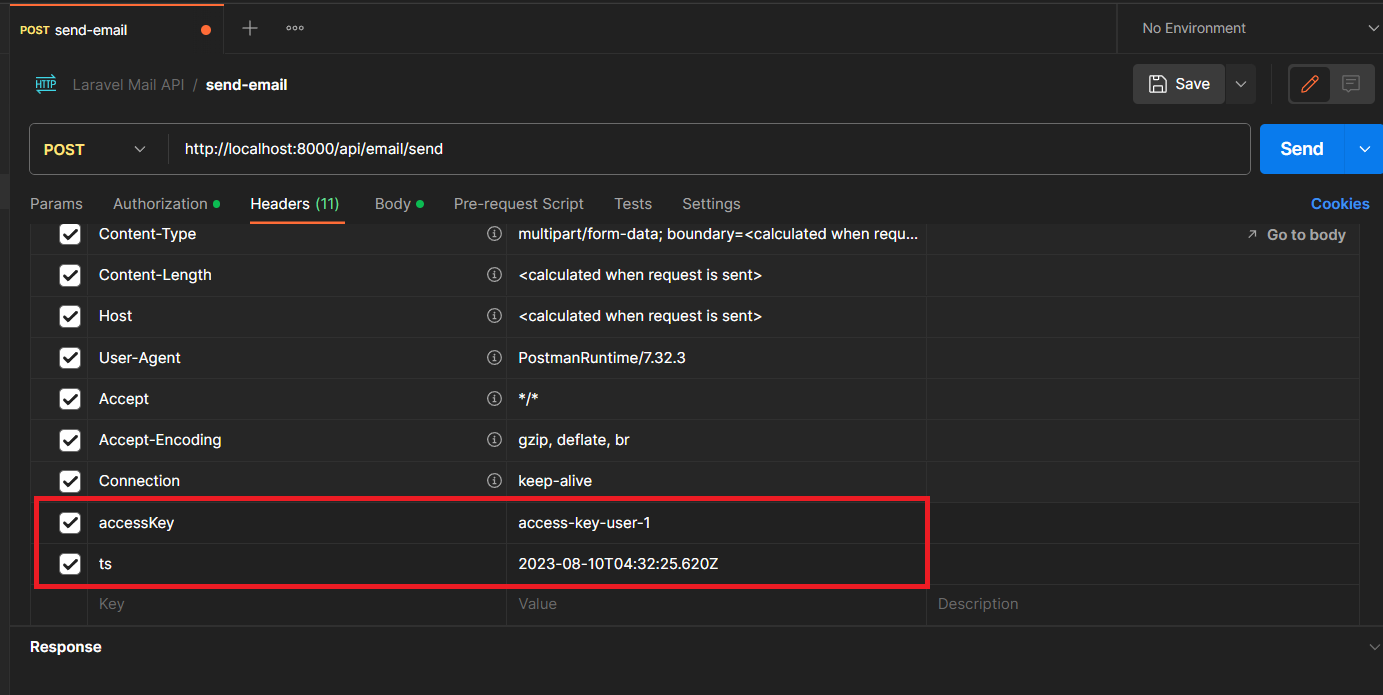
To send a valid request, provide the following header data:
- accessKey: the index on the array of appKey and appSecret you’re using to create the signature. In our sample, access-key-user-1;
- ts: the timestamp used to create the signature, we used 2023-08-10T04:32:25.620Z;
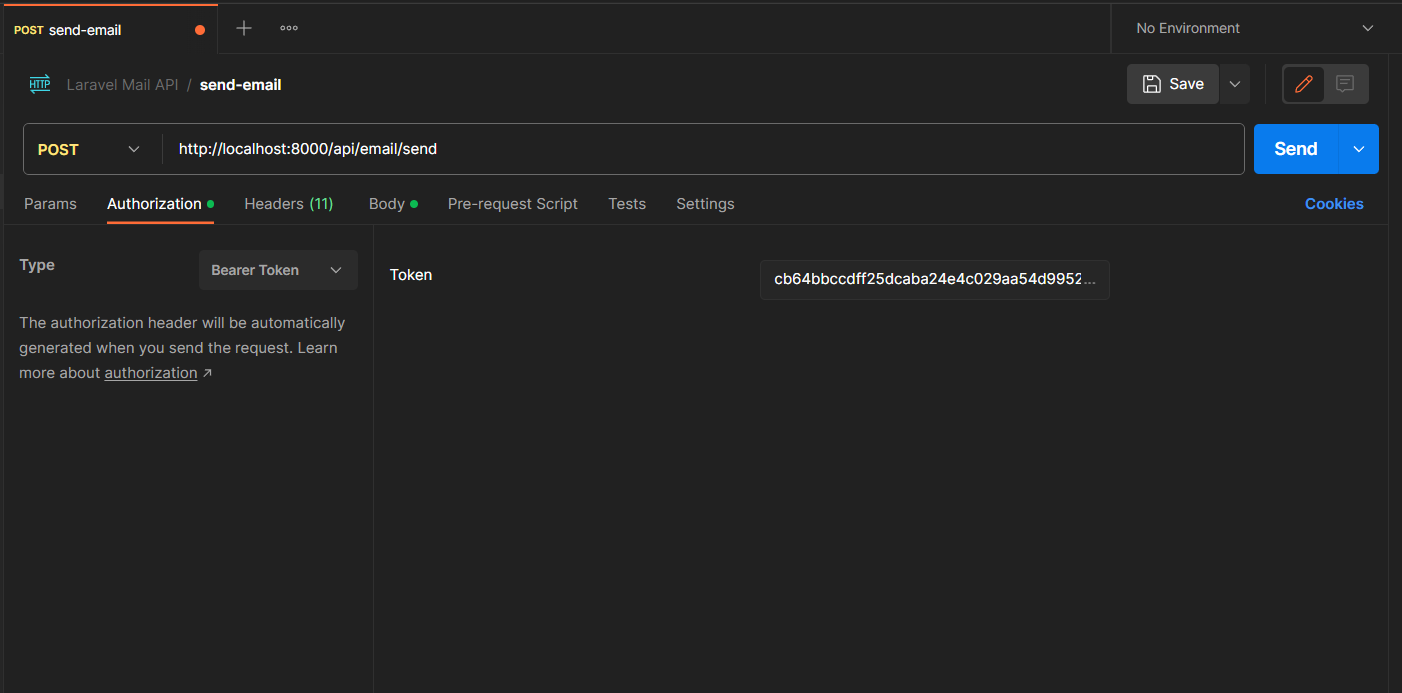
- Authorization: Bearear {signature}. The created signature.
To enhance the testing, a postman collection was provided. You can find it in the root folder, named Laravel Mail API.postman.collection.
Finally, we need to define the body parameters to fulfill the requirements, sending a multipart/form-data request.
The available fields are:
(Note: The fields tagged with * are required.)
- From; *
- To; *
- sender;
- receiver;
- subject;
- template;
- language;
- attachments[];
The Sender should belong to the same group of emails as the one used to authenticate our SMTP server.
After submitting the request, your email will be sent in a background process. To consume the queue and have your email sent, run:
$ php artisan queue:workor if you're using Docker:
$ ./vendor/bin/sail php artisan queue:workNote: The command above is handy for local development and testing purposes, but it is strongly recommended to use Supervisor to manage your queue processes. Laravel has a nice starting point for its configuration here.
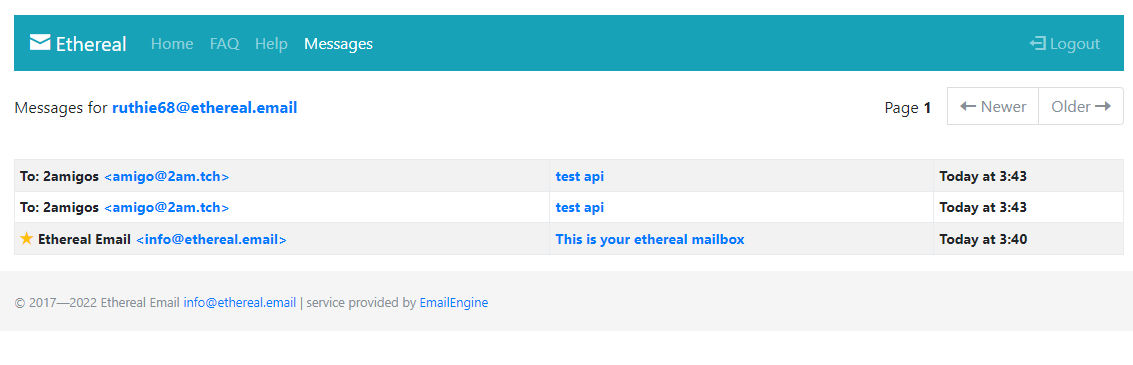
You can access https://ethereal.email/messages/ to visualize the sent messages.
The fields “Sender” and “Receiver” are used to define their names and the “Attachments” allow you to select the attachments.
Attachments
By default, you’re allowed to send PDFs and all image MIME types. You can set the list of mimetypes you want to allow on ./config/laravel-mail-api.php. Defining ‘*’ allows all MIME types.
[
    …
    'attachmentsAllowedMimetypes' => env('ATTACHMENT_MIMETYPES', ['application/pdf',     'image/*']),
    …
]
Template and Localization
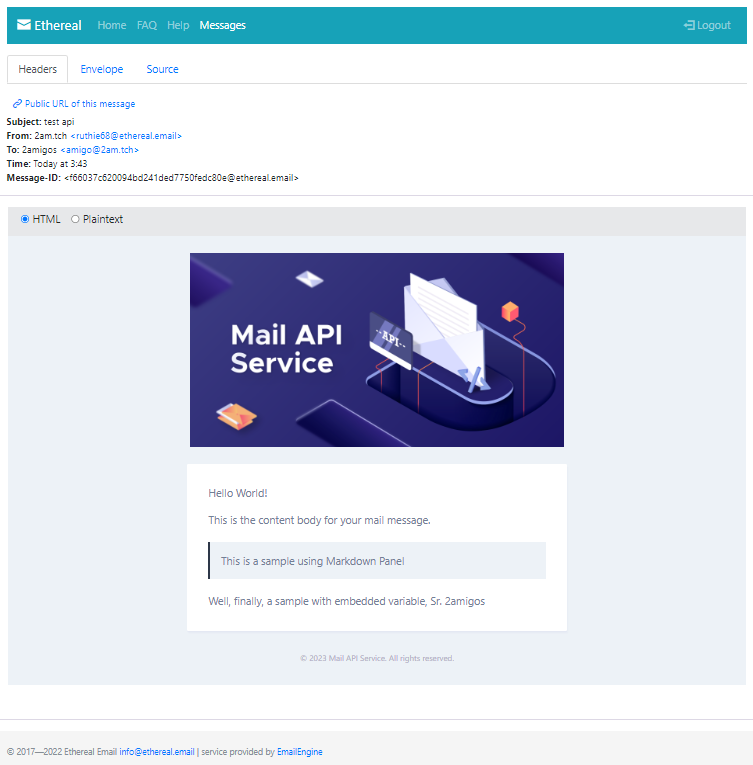
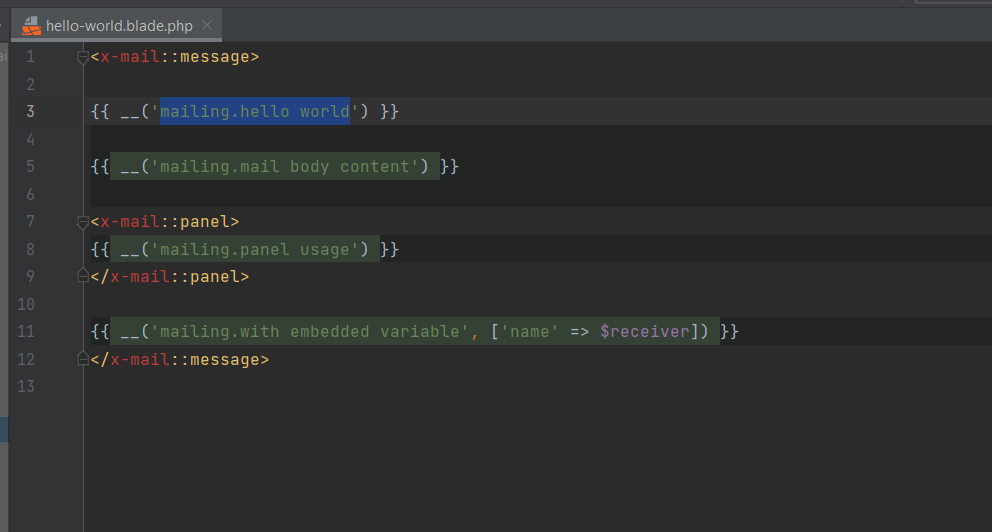
The “Template” field defines the template to be used for the message.
The template uses Laravel markdown to enhance the layout development and already has localization defined with Laravel Localization.
The template folder is ./resources/views/templates and you define the default template setting DEFAULT_TEMPLATE={template_name} on your .env file.
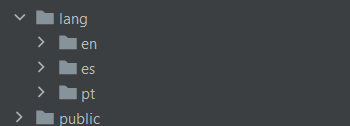
Two templates are provided with the application: hello-world.blade.php and password.blade.php. They already have the configuration for English, Spanish, and Portuguese.
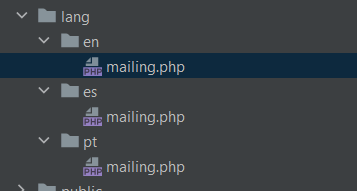
To use the localization feature, define a set of folders for the languages you’re going to support under the ./lang folder.
Then, create a language file in each folder. You must define a key-value structure where the key is the section name on the view, and the content is the text in the target language. You can create as many files as necessary. In this example, we’ll be using mailing.php only.
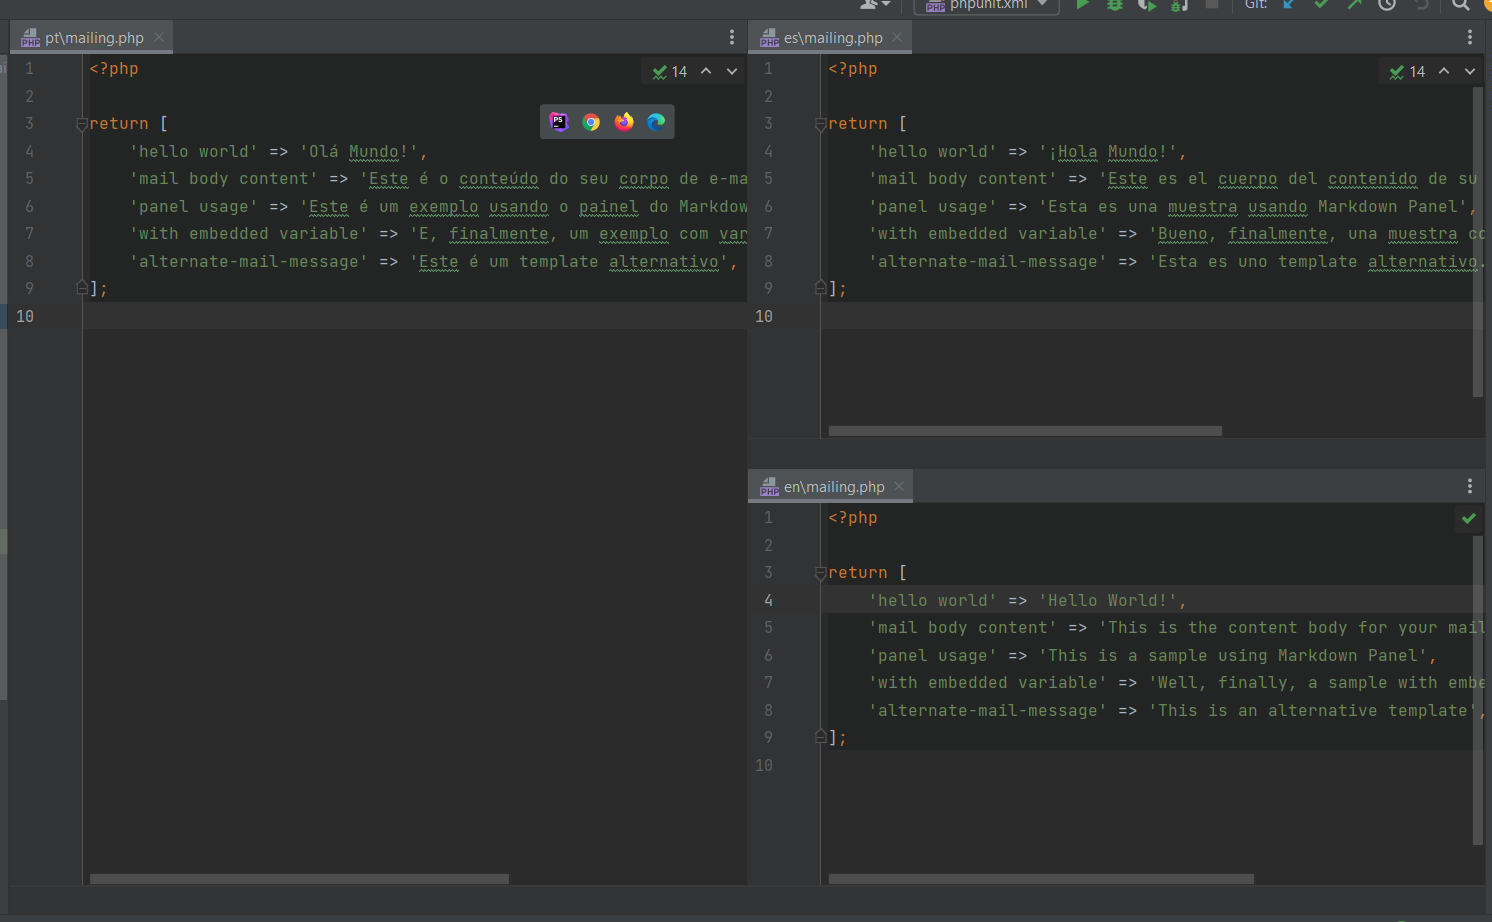
Then, on the view you use the accessor __() with a string ‘{language_file_name.key} to access its content. e.g __(‘mailing.hello world’).
To define the message target language, use the field language on the request body. It must match the language folder name.
The default language is English (en). You can define the default language for the application defining LANGUAGE={language} on your .env file.
And that's it! After following the above steps, you have easily and securely set up and configured the microservice to efficiently handle email sending.
Accelerate Your Career with 2am.tech
Join our team and collaborate with top tech professionals on cutting-edge projects, shaping the future of software development with your creativity and expertise.
Open Positions